More tricks and cool links........

You will get more tricks and tips from this blog.
Jobs from Indeed

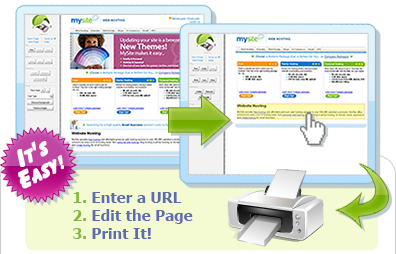
Eco Friendly Web Page Printing

With this online utility, you can remove ads, images of a webpage before printing. You can also change font size or font type. Save money and environment by reducing paper and ink usage. 

http://www.printwhatyoulike.com/

Enter a URL, Edit the Page, Print It
  • Save money and the environment by reducing your paper and ink usage
  • Condense any web page down to just the content you want in one click - no more pasting into Word!
  • Fix common printing problems such as text running off the page
  • Enter a URL and click Start. There is nothing to download - everything runs in your browser
  • Make the page more readable by changing the font size and type and removing the background
  • Combine multiple web pages - edit & print them as one document!
  • Save your modified page as a PDF or HTML document
  • Remove ads and other junk you don't want

Best free deleted file recovery software

EASEUS Data Recovery Wizard Free Edition 5.0.1 Freeware

EASEUS Data Recovery Wizard Free Edition 5.0.1New - Free full-functional file recovery software!
Free and powerful deleted file recovery software to recover 1 GB file free of charge. It solves all data loss problems - recover deleted files emptied from Recycle Bin, or lost due to software crash, formatted or damaged hard drive, virus attack, lost partition and other unknown reasons under Windows 2000 / XP / 2003 / Vista / 2008 / 7. It recovers deleted files from formatted partitions with original file names and storage paths. Moreover, the free data recovery software works well with dynamic disk, RAID and Linux EXT2/EXT3 file system.

Advantages over other free file recovery software:

  • Recover deleted files from formatted partitions with original file names and storage paths.
  • Recover deleted files from lost/deleted partitions.
  • Recover deleted files from dynamic disks.
  • Recover deleted files from Linux file system partition under Windows.

Use Kaspersky for unlimited period

I know lot many people use Kaspersky though there are some superb free antivirus software .People get sick of searching kaspersky keys and cracks.It is obvious to say things get messed up when the software product doesn't turn up to the expectation.Leave this, we will get a way round it to use this antivirus without any product key , crack or any thing related to that.Guess what it works for the latest version of Kaspersky.Now you've got to follow the steps given below accurately.

Download the kaspersky from its official website.

Now here are the steps through which your version would be converted into beta version and the keys would never get blacklisted .

1. Download and install Kaspersky (Activate with a Trial License) .
2. Go to Kaspersky’s settings, click Options, and untick Enable Self-Defence .
3. Exit Kaspersky .
4. Go to Start, run, then type regedit and press enter .
5. Press CTRL+F and type in ProductStatus and hit enter .
6. Double click ProductStatus and change Release to Beta (it may say Trial instead of Release) .
7. Press OK then open Kaspersky.
8. Tick Activate beta license then press Next and Finish .
9. Re-enable Self-Defence.
10. Every 30 days Kaspersky will ask for a license, simply click Activate Beta and boom you’re good to go .

Megavideo Time Limit hack

Several websites offer services to download the videos directly to your PC by just providing the megavideo links.

Customizing OEM Logo in Windows Vista

If you bought your computer from famous laptop/PC manufacturers like Dell, HP, Lenovo, Acer, Toshiba, Sony and others, you might have noticed that when you Right-Click->select Properties for "My Computer" a logo and some information will be displayed.

You can customize it!

1. Create a Square logo that is almost the same size as the Windows Vista Logo. You can use Windows Photo Gallery in cropping the picture. The exact size is 120x120. But if it is a little bit bigger, no problem, as long as it is a square.

2. Save it as a bitmap (.bmp)

3. Open the registry by typing "regedit" in the Start menu search and Navigate to the following registry path:

HKEY_LOCAL_MACHINE\ SOFTWARE\ Microsoft\ Windows\ CurrentVersion\ OEMInformation

4. Double Click the Value Name "Logo" and input the path where the logo is being saved.

5. You can change other information's such as SupportURL, Manufacturer and Model.

That's it! Enjoy!

Create your Free Website.

http://www.hpage.com/


  • Registration in 2 minutes, ready to go immediately


  • 300 MB free storage space


  • More than 300 professional designs


  • Own address: Username.hPage.com


  • Easy, intuitive menus and handling


  • Free design possible: images, videos, music, downloads, and more...


  • Endless possibilities for expanding your website


  • Extensive, convenient online help


  • Many extras for your website


  • Easy online editor


  • Online communication with other hPage.com users


  • High-speed servers in Germany


  • Daily back-up


  • 100% free!


  • http://www.hpage.com/

    Earn Money Using Social Networking Sites

    If you have been over the internet for any period of time, I can guarantee that you must be having accounts on the various social networking sites like Facebook, Orkut, Twitter, Hi5 and so on…
    But I can also be sure of the fact that till now, you have logged on to these sites either to connect with your friends, make profile photos, upload photos/videos, create and join groups and similar many other activities. Isn’t it?
    But do you earn through them? No! So, now I am telling you some social networking sites that will help you not only connect with friends but earn money too. And as you must be aware, that earning money through internet is a hot and a growing industry these days. So why be away from that? And making money on the internet requires a great deal of application and time. It also needs a certain plan of action, or else you are not going to reach anywhere.
    Social networking sites are all the rage these days. They are useful in growing business, learning of new opportunities or for just old-fashioned networking and reaching out to people. And more than that they help you create millions. Check how!
    Here is the list of sites that will help you earn money. Mylot is the oldest of the lot. And helps you earn money by letting you share your own profile, participate in discussions, submit your own blog and refer more people to this site and earn money through their referral program.
    Next on the list is Yuwie, which is quite similar to the above, but also pays you for the total number of page views. Another one is the You say too, which helps you earn through Adsense spilt 50-50 with the users, along with the usual features in a social networking site.
    Gather and Tagfoot are also some of the sites. But let me warn you that if your aim is to make big money from these sites, you will be disappointed. Instead, use them for what they really are: social networking sites. And if you are able to make some extra money out of this, well, that’s your bonus! So, what are you waiting for? Go ahead and earn!

    How To Open Docx Files Without Microsoft Word

    This tutorial is for all those people who dont have Microsoft office 2007 and they want to open docx files.Microsoft introduced the docx format with the release of its 2007 office suit.All the files created in Microsoft office 2007 are by default in the format of docx,pptx,xlsx which are not compatible with the 2003 office suite of Microsoft.If you dont want to buy Microsoft office 2007 or you dont want to upgrade your office suite from 2003 to 2007 or 2010 version then in this tutorial you will learn that how we can use alternative freeware utilities to resolve this situation.

    We are providing you with Four Solutions to solve this problem

    1.Use Microsoft Office compatibility pack

    Well this option is for only those user who have Microsoft office 2003 installed on their systems.Microsoft office compatibility pack will convert the docx format into a compatible format that can be easily opened with the Microsoft 2003 office suite.It is available for download directly from Microsoft official website.

    2.Download Open Office

    Open office is the default office suite for Linux users .It is available for downloading for windows,Linux as well as Mac users.It is available for free and as the name suggests it is also open source.It is also compatible with some other formats.

    3.Dev Vicky world 2010 office suite

    If you want to go for a very light weight application then go for this software.It is a freeware utility that can be used to open docx files.

    4.Use Google Docs to open Docx Files

    Google Docs is an online suite to view files on the Internet.You can upload your document into it and view it.Another method that you can use is that you send a gmail email to your own email id with the Docx file attached to it.When you will open this email gmail will give you an option to view this mail.

    Speed up the Start Menu

    You can use this tip to speed up the Start Menu in Windows XP release candidate 1. You can customize the speed of the Start Menu by editing a Registry Key.


    Click Start, and then click Run.

    Type Regedit in the box, and then click OK.

    Expand the menu in the left panel and select the HKEY_CURRENT_USER\Control Panel\Desktop folder.

    Scroll down in the right panel and double click on the MenuShowDelay file.

    In the Value Data box, change to default value for the menu speed from 400 to a lesser number, such as 1.

    Click OK.

    Caution: Incorrectly editing the registry may severely damage your system. Before making changes to the registry, you should back up any valued data on your computer.

    India's First Simple Music Search Engine

    http://www.muphaze.com/

    Music Search Engine with one One Click Download,and Even you can play the Music online

    How to Hack Windows Administrator Password

    This hack will show you how to reset Windows administrator password (for Win 2000, XP, Vista and Win 7) at times when you forget it or when you want to gain access to a computer for which you do not know the password.

    Most of us have experienced a situation where in we need to gain access to a computer which is password protected or at times we may forget the administrator password without which it becomes impossible to login to the computer. So here is an excellent hack using which you can reset the password or make the password empty (remove the password) so that you can gain administrator access to the computer. You can do this with a small tool called  Offline NT Password & Registry Editor. This utility works offline, that means you need to shut down your computer and boot off your using a floppy disk, CD or USB device (such as pen drive). The tool has the following features.
    • You do not need to know the old password to set a new one
    • Will detect and offer to unlock locked or disabled out user accounts!
    • There is also a registry editor and other registry utilities that works under linux/unix, and can be used for other things than password editing.
     

    How it works?

     
    Most Windows operating systems stores the login passwords and other encrypted passwords in a file called sam (Security Accounts Manager). This file can be usually found in \windows\system32\config. This file is a part of Windows registry and remains inaccessible as long as the OS is active. Hence it is necessary that you need to boot off your computer and access this sam file via boot. This tool intelligently gains access to this file and will reset/remove the password associated with administrator or any other account.
    The download link for both CD and floppy drives along with the complete instructions is given below
    It is recommended that you download the CD version of the tool since floppy drive is outdated and doesn’t exist in today’s computer. Once you download you’ll get a bootable image which you need to burn it onto your CD. Now boot your computer from this CD and follow the screen instructions to reset the password.
     

    Another simple way to reset non-administrator account passwords

     
    Here is another simple way through which you can reset the password of any non-administrator accounts. The only requirement for this is that you need to have administrator privileges. Here is a step-by-step instruction to accomplish this task.
    1. Open the command prompt (Start->Run->type cmd->Enter)
    2. Now type net user and hit Enter
    3. Now the system will show you a list of user accounts on the computer. Say for example you need to reset the password of the account by name John, then do as follows
    4. Type net user John * and hit Enter. Now the system will ask you to enter the new password for the account. That’s it. Now you’ve successfully reset the password for John without knowing his old password.
    So in this way you can reset the password of any Windows account at times when you forget it so that you need not re-install your OS for any reason. I hope this helps.

    Change Windows 7 Logon Screen Background

    How would you like to change the logon screen background in Windows 7 so as to give your Windows a customized look and feel? With a small tweak it is possible to customize the Windows 7 logon screen and set your own picture/wallpaper as the background. Changing logon screen background in Windows 7 is as simple as changing your desktop wallpaper. Well here is a step by step instruction to customize the
    logon screen background.

    1. The image you need to set as the background should be a .jpg file and it’s size should not exceed 245KB.

    2. The image resolution can be anything of your choice. However I prefer 1440 x 900 or1024 x 768. You can use any of the photo editing software such as Photoshop to compress and set the resolution for your
    image. Once you’re done, save this image as backgroundDefault.jpg.

    3. You will need to copy this image to
    C:Windowssystem32oobeinfobackgrounds

    You will need to create that path if it does not already exist on your computer.

    4. Now open the Registry Editor (Start -> Run -> Type regedit) and
    navigate to the following key

    HKLMSoftwareMicrosoftWindowsCurrentVersionAuthenticationLogonUIBackground
    If Background does not exist rightclick LogonUI, select New and then Key, and then name it Background. Now locate OEMBackground (listed on the right side). If it does not exist, right-click Background and
    select New and then DWORD and name it OEMBackground.

    5. Double-click on OEMBackground and set the Value Data to 1.

    6. Now log-off to see the new logon screen background. If you would like to revert back to the default background, just set the Value Data back to 0.

    GMail Drive

    GMail was the first web-based email service that gave its users 1GB of storage space. Since then the storage was raised to 4 GB and now its 7+ GB and counting – an ever-increasing space. Not all users need this much space for their email inbox. If there was some other way you could use all this extra space?
    I think the some intelligent developers were thinking the same thing and the GDrive was created. GMail Drive is a Shell Namespace Extension that creates a virtual file system around your Google Mail account, allowing you to use Gmail as a storage medium.

    Once you download (link below) and install GMail drive, you would see a new drive icon in your My Computer window. You can create new folders, copy and drag-n-drop files to this drive. (You may or may not be asked to restart your computer)

    GMail Drive v1.0.16 - download site #1 (Softpedia)
    GMail Drive v1.0.16 - download site #2 (Betanews)


    In order to start storing files on your GMail drive you need to first login to your GMail account. Just right-click on the GMail drive and click login -


    You would get a window where you can input your GMail id and password and you would be logged in once you enter correct details.


    You can choose whether to auto-login every time by checking the auto-login box.

    Google Search in new way

    Do you know about the unofficial Google shell. This a site which let you to search google in new way.If you have some experience with linux and unix you will love it. This is a google-interface behaves similar to a unix-shell.You type commands and the results are shown on this page.
    goosh is written by Stefan Grothkopp

     This is NOT an official google product!

    Goosh is open source under the Artistic License/GPL.

    Click here to check this

    http://goosh.org/

    How to hide Files in pictures

    Hiding Files in pics (It`s a nice trick to save your data file from unauthorised access in a very simple manner)

    # You will need the following.. Windows 2000 / xp
    # WinRar

    1. Gather your image and the files you wish to lodge into it. Here I have a jagath.txt which I will hide inside my ashwarya.jpg.

    2. Add the files(e.g jagath.txt) you want to hide into a new RAR archive. (in the archieve name box type jagath.txt and hit enter. Now ur file is in format jagath.txt.rar)

    3. Open Command Prompt and go to the folder where your files are located, e.g., ‘C:\jagath’.

    4. At command prompt type ‘copy /b ashwarya.jpg + jagath.txt.rar ashabhi.jpg’ (without quotes).
    (ashwarya.jpg is the picture I want to show, jagath.txt.rar is the file to be hidden, and ashabhi.jpg is the file which contains both).

    5. Now test the ashabhi.jpg by double clicking it, and verifying it still opens.

    6. Now try opening that same ashabhi.jpg file from menu i.e right click on doc.jpg file you have created : openwith->WinRar archiever. It will show the original hidden file jagath.txt.

    Now ashabhi.jpg is a simple JPEG for others, but it contains a secret file jagath.txt for you…

    You can hide any type of files (mp3, doc, txt, avi, mpg, 3gp etc..)

    Use Windows 7 to create a Wi-Fi network without using router

    If you have got Wi-Fi in your laptop and have Windows 7 installed in it then you can easily turn it into a Wi-Fi hotspot and share your net connection with other people in the range and Virtual Router is the easiest way to do so.
    Virtual Router is an open source software which leverages the Wireless Hosted Network API which is a part of the new Windows Operating Systems (Windows 7 and Windows server 2008).

    With this feature, a Windows computer can use a single physical wireless adapter to connect as a client to a hardware access point (AP), while at the same time acting as a software AP allowing other wireless-capable devices to connect to it. This feature requires that a Hosted Network capable wireless adapter is installed in the local computer. (quoted from MS library)
    The program is really simple to use. After downloading and installing the software all you have to do is specify the network name and password to access this network. It uses the WPA-2 encryption to protect the wireless network from unwanted users.


    The program requires only 20mb of RAM and is pretty simple to understand and use. Requires Windows 7 or Windows server 2008 to run.

    Download Virtual Router | Virtual Router homepage

    How to create a torrent?

    uTorrent

    utorrent bit torrent
    1. File > Create new Torrent (or CTRL + N)
    2. Select the files and or directories
    3. Trackers: This is probably the hard part for most people. But it’s pretty easy, just put in one of the popular public trackers. You can use one or more trackers, but in general one is enough.
    Here are some good trackers you can use:
    http://open.tracker.thepiratebay.org/announce
    http://www.torrent-downloads.to:2710/announce
    http://denis.stalker.h3q.com:6969/announce
    udp://denis.stalker.h3q.com:6969/announce
    http://www.sumotracker.com/announce
    Put one of these in the tracker box
    4. Do NOT tick the private torrent box (unless you’re using a private tracker)
    5. Save the torrent and send it to your friends
     
     
    bitcomet bit torrent
    1. File > Create Torrent (or CTRL + M)
    2. Select the files and or directories
    3. Select “enable public DHT network” from the dropdown box
    This way you can be your own tracker if the public tracker goes down.
    4. Tracker server and DHT node list
    Again, This is probably the hard part for most people. But it’s pretty easy, just put in one of the popular public trackers. You can use one or more trackers, but in general one is enough.
    Here are some of the most popular trackers at the moment:
    http://open.tracker.thepiratebay.org/announce
    http://www.torrent-downloads.to:2710/announce
    http://denis.stalker.h3q.com:6969/announce
    udp://denis.stalker.h3q.com:6969/announce
    http://www.sumotracker.com/announce
    Put one of these in the tracker box
    5. Save the torrent and send it to your friends
     
     
    azureus bit torrent
    1. File > New Torrent (or CTRL + N)
    2. Tick “use an external tracker”.
    And again, This is probably the hard part for most people. But it’s pretty easy, just put in one of the popular public trackers.
    Here are some of the most popular trackers at the moment:
    http://tracker.prq.to/announce
    http://inferno.demonoid.com:3389/announce
    http://tracker.bt-chat.com/announce
    http://tracker.zerotracker.com:2710/announce
    Put one of these in the tracker box
    3. Select single file or dicectory, click NEXT and point to the file or directory you want to share, and click NEXT
    4. Do NOT tick “private torrent”
    5. Do tick “allow decentralized tracking”
    6. Save the torrent and send it to your friends
    Windows XP Passwords Breaking Tricks

    1. Place your Windows XP CD in your cd-rom and start your computer (it’s assumed that your XP CD is bootable – as it should be - and that you have your bios set to boot from CD)
    2. Keep your eye on the screen messages for booting to your cd Typically, it will be “Press any key to boot from cd”
    3. Once you get in, the first screen will indicate that Setup is inspecting your system and loading files.
    4. When you get to the Welcome to Setup screen, press ENTER to Setup Windows now
    5. The Licensing Agreement comes next - Press F8 to accept it.
    6. The next screen is the Setup screen which gives you the option to do a Repair. It should read something like “If one of the following Windows XP installations is damaged, Setup can try to repair it” Use the up and down arrow keys to select your XP installation (if you only have one, it should already be selected) and press R to begin the Repair process.
    7. Let the Repair run. Setup will now check your disks and then start copying files which can take several minutes.

    8. Shortly after the Copying Files stage, you will be required to reboot. (this will happen automatically – you will see a progress bar stating “Your computer will reboot in 15 seconds”
    9. During the reboot, do not make the mistake of “pressing any key” to boot from the CD again! Setup will resume automatically with the standard billboard screens and you will notice Installing Windows is highlighted.
    10. Keep your eye on the lower left hand side of the screen and when you see the Installing Devices progress bar, press SHIFT + F10. This is the security hole! A command console will now open up giving you the potential for wide access to your system.
    11. At the prompt, type NUSRMGR.CPL and press Enter. Voila! You have just gained graphical access to your User Accounts in the Control Panel.
    12. Now simply pick the account you need to change and remove or change your password as you prefer. If you want to log on without having to enter your new password, you can type control userpasswords2 at the prompt and choose to log on without being asked for password. After you’ve made your changes close the windows, exit the command box and continue on with the Repair (have your Product key handy).
    13. Once the Repair is done, you will be able to log on with your new password (or without a password if you chose not to use one or if you chose not to be asked for a password). Your programs and personalized settings should remain intact TESTED ON SP1
    And in case you are wondering, NO, you cannot cancel install after making the changes and

    expect to logon with your new password.

    Ok, now that your logon problem is fixed, you should make a point to prevent it from ever happening again by creating a Password Reset Disk. This is a floppy disk you can use in the event you ever forget your log on password. It allows you to set a new password.
    Here's how to create one if your computer is NOT on a domain:
    Go to the Control Panel and open up User Accounts.
    Choose your account (under Pick An Account to Change) and under Related Tasks, click
    "Prevent a forgotten password".
    This will initiate a wizard.
    Click Next and then insert a blank formatted floppy disk into your A: drive.
    Click Next and enter your logon password in the password box.
    Click Next to begin the creation of your Password disk.
    Once completed, label and save the disk to a safe place
    How to Log on to your PC Using Your Password Reset Disk
    Start your computer and at the logon screen, click your user name and leave the password box blank or just type in anything. This will bring up a Logon Failure box and you will then see the option to use your Password Reset disk to create a new password. Click it which will initiate the Password Reset wizard. Insert your password reset disk into your floppy drive and follow the wizard which will let you choose a new password to use for your account.
    Note: If your computer is part of a domain, the procedure for creating a password disk is different.

    CWG Free Live Streaming Video on Mobile

    Now watch Commonwealth Games live on your mobile phones from anywhere in the country.

    http://m.zoomi.in

    The Games' Organising Committee today launched the live video streaming of events in partnership with an Indian knowledge services firm ''Smile of India''.

    This, the OC said, would bring the Games closer to millions of Indians across the country and would allow them to watch live action anywhere on their mobile phone.

    "We have always taken pride in leveraging Delhi 2010 platform for showcasing latest technical advancements to the world. Live video streaming on mobile allows people across the length and breadth of the country to catch all the action even when they are on the move and do not have access to TV," said OC chairman Suresh Kalmadi.

    Commonwealth Games Delhi 2010 Mobile Video Streaming would work on diverse handsets and can be accessed from http://m.zoomi.in and will require a GPRS connection.

    The live video streaming is free of cost to the user, though data accesses charges apply, officials said.

    Kalmadi also thanked the thousands of workers who helped repair the athletics track and lay 70 lanes of turf across the in-field at the Jawaharlal Nehru Stadium and have it ready in time for the track and field competition that began this evening.

    "We made sure that the schedule of the blue riband track and field competition was adhered to," he said adding that he was glad that they dispelled doubts about the athletics competition beginning as scheduled since the track needed some repair and the process of laying the in-field turf was in progress after the opening ceremony. Kalmadi said he was delighted that the track got ready for competition in time and to the satisfaction of the IAAF Technical Delegate Bill Bailey.

    "As Commonwealth Games Federation president Michael Fennell pointed out this morning, the repair needed for the track after the opening ceremony is not unique to Delhi 2010," he said.

    Courtesy: Yahoo

    Show Your name after time in taskbar...

    Try this  trick to add up ur name in place of AM and PM beside time
    Its simple

    Step-1:- Navigate to -> Start -> Control Pannel -> Regional and Language Option -> Click on Customize -> Go to TIME Tab -> Change AM symbol and PM symbol from AM and PM to ur name -> Apply -> Ok ...
     
    eg: AM name or PM name so you can see 2:58 PM name

    Did It change? If not, follow step-2 below.

    Step2:- Now go to time in taskbar and Double Click it to open "Date and time property" ...Look place where time changes in digital form i.e. 02:47:52 AM , click to arrow to cnage the AM or PM by selecting and press arrow. It will Show ur name or name that was entered by u, Apply -> OK and be HAPPY

    How to hack Rapid share

    This is for those who have to wait for about an hour after downloading certain amount of stuff from rapid share. To overcome this time constraint follow these steps:
    RAPID SHARE
    Method 1
    1.open your rapid share link
    2.then click on free.
    3.As soon as timer start type this in address bar and click enter
    javascript:alert(c=0)
    4.a pop up message will come click ok your counter is zero just download the stuff

     
    Method 2
    1.Delete the cookies in your browser internet explorer or Firefox or opera or whatever u use).
    2.Press start->run,type cmd.
    3.In the command prompt,type ipconfig/flushdns press enter.Then type ipconfig/release,then ipconfig/renew .Now type exit.
    4.Now try downloading, for many people this may work if their ISP provides a dynamic ip

    Method 3
    1.Just switch off your router or modem) and switch it back on.
    2.This may work for some users Mtnl and Bsnl) and maybe some others too.

    Actually these methods generally work for those people whose ISP gives them dynamic ip.
    If these don't work then one more thing that can be done is to use proxies.
    Method 4
    1.Download the software Hide ip platinum
    2.Run it, then it will automatically chose a proxy (ip of a different country) for you. So you can easily download without any restrictions. You just have to change the proxy each time you download.


    Commonwealth Games 2010 Delhi Live Streaming


    This Video is third party link available free on the internet and we do not stream any of the channels.

    Gmail Labs Introduces Video Chat Enhancement Feature


    If you use Gmail Video and Voice Chat on a regular basis, you would appreciate this new Gmail Labs feature. When this labs feature is turned on (by both sides), you would see a higher video resolution and a larger Video Chat window.

    This new Labs feature which was just rolled out allows users to preview new video chat features before they’re turned on for everyone.
    Visit the Gmail Labs tab under Settings, turn on “Video chat enhancements,” and right away, you’ll see higher resolution video and a bigger video chat window.
    The higher resolution video uses a new playback mechanism which enables widescreen VGA and frees up valuable resources on your computer.
    For it to work, both you and the person you’re chatting with will need to have the lab turned on. Remember that you can always revert to standard video chat by disabling the lab.

    If you have featured enabled any new features introduced for video chat would be automatically enabled for you. This feature is enabled by default for Linux users.

    Related Posts Plugin for WordPress, Blogger...